By
Philip Churchill on July 10th, 2013
Installing and configuring the Archive Manager client
This is the fourth article of this series. Previous articles provided an overview of the OBH service, Archive Manager backup software, Explorer file-sync add-in as well as configuring your server for web hosting. This article assumes you have your server configured for web hosting and the OBH client host setup.
This article describes setup and configuration of the Archive Manager client on a Windows-based PC to enable a private online backup solution directly to your server running the OBH client host.
Installation of Archive Manager on your Windows-based system is a simple wizard-guided process. The complexity of configuration Archive Manager is based on the specific usage requirements of the client. The steps below focus on installation and configuration of Archive Manager for the most common backup, archive and restore requirements. Archive Manager is a full-featured backup/archive software package which can be used to protect data to local storage devices in addition to the configured OBH server. You can find additional details about configuring and using Archive Manager on the website http://www.thearchivemanager.com
The Archive Manager software has a retail price of $29.99 but you receive a free copy of Archive Manager for each seat included in your subscription to the personal online backup host service.
Locate the installation package named ArchiveManagerOBH.exe. Double-click the file to launch the installation wizard. You can download the installation package directly from the website. Archive Manager will continue to run as long as it’s connected to an OBH server. A fully-featured 60-day free trial is available.
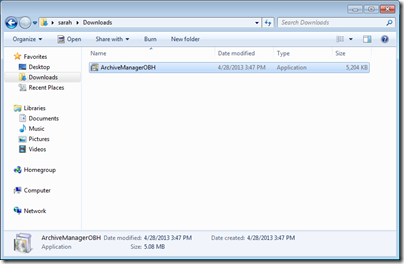
Figure 1 – Archive Manager download package
The installation wizard will automatically evaluate the system and gather requirements
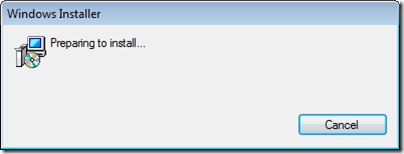
Figure 2 – Archive Manager installation prepare
Read and accept the license agreement and click Next to continue
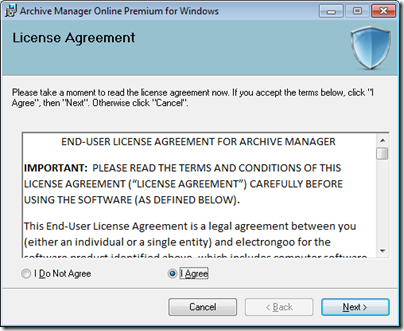
Figure 3 – Archive Manager license agreement
Select a location to install the Archive Manager software and click Next
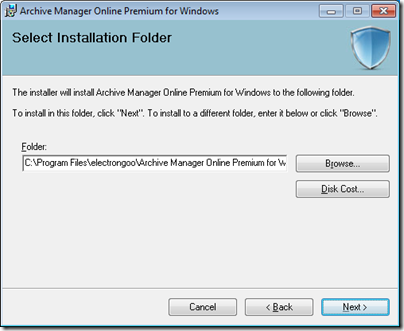
Figure 4 – Archive Manager installation folder
At this point, the installation wizard has enough information to install the Archive Manager software. Click Next to begin the installation. If any missing dependencies are detected, such as the Microsoft .NET 4.0 Framework, you will be prompted and provided a URL to download the dependences from the Microsoft website.
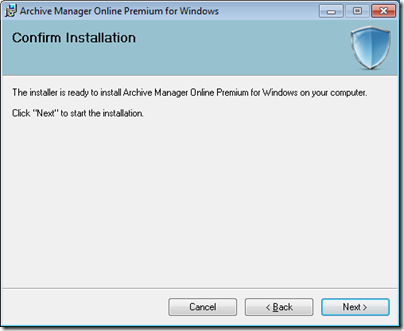
Figure 5 – Archive Manager installation information gathered and ready
The installation proceeds
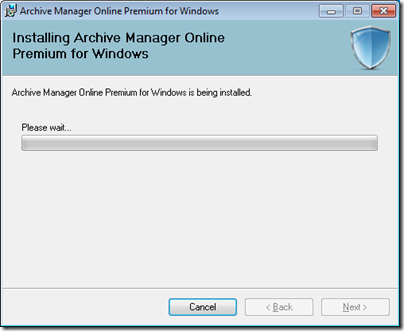
Figure 6 – Archive Manager installation progress
You are notified once installation is complete. Press the Close button to finalize the process. The Archive Manager software will automatically launch after installation is complete.
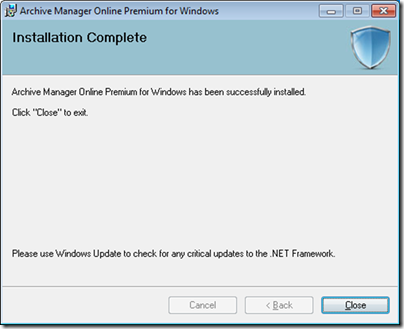
Figure 7 – Archive Manager installation complete
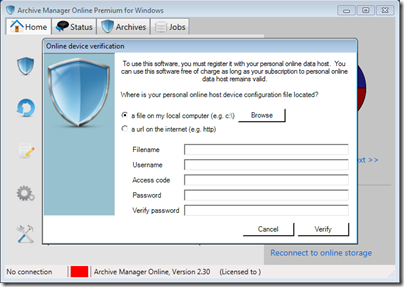
Figure 8 – Archive Manager OBH device verification
The Online Device Verification dialog prompts for the clients OBH account authentication details. Enter each value and press Verify to continue.
· Device configuration file – this file will be provided by the administrator of the OBH server. The administrator will provide you the file in one of two forms:
o A file of the form username_id.cfg
o A URL of the form http://www.awebsite.com/ username_id.cfg
· Filename/Url – depending if you are using a file or a url to locate the Device Configuration File (.cfg) this will be either:
o The full path to a .cfg file stored on your local system
o A URL pointing to a web server to download the .cfg file
· Username – this is an alphanumeric value provided to you by the administrator of the OBH server. This friendly identification will uniquely identify you
· Access code – this is a numeric value provided to you by the administrator of the OBH server. This is a temporary value allowing you to create your own personal password. Once the account has been verified and activated the access code is no longer valid. The user created password will be used for all future authentication
· Password – enter a unique personal password of your choice. Save this password in case you ever need to re-authenticate the Archive Manager software. This password will be encrypted and hashed for your protection at all times
· Verify Password – re-enter the same unique personal password for verification purposes
You will be notified when the software has been activated. If activation fails then verify your entry matches the information the administrator of the OBH server provided to you and re-try. If activation still fails then contact the administrator and verify your account is enabled and the OBH server is currently online
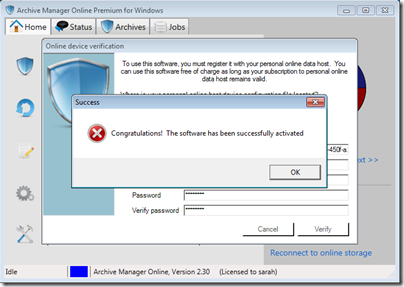
Figure 9 – Archive Manager device verification complete
Click the OK button and Archive Manager’s one-time configuration wizard is launched
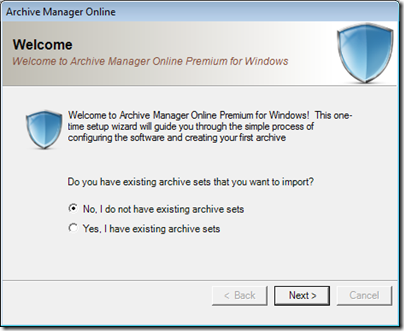
Figure 10 – Archive Manager one-time software configuration
Since this is a first-time installation of Archive Manager, select “No, I do not have existing archive sets” and press the Next button where you will create an encryption key to protect your data. Setting an encryption key protects your data as it is transmitted over the internet and stored on the OBH server.
An encryption key must be between 8 and 32 characters in length. The longer the encryption key, the more secure your data will be. Make sure you remember your encryption key. If you ever re-install the Archive Manager software then you must re-enter your encryption key to recover and reattach existing archives.
Enter a personal encryption key and click the Set key button
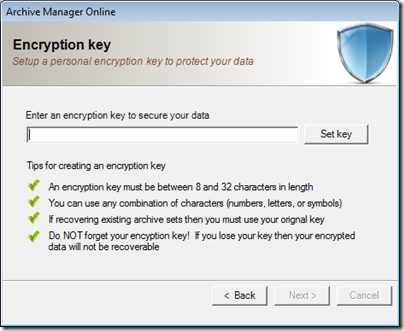
Figure 11 – Archive Manager encryption key configuration
Re-enter your personal encryption key and press Verify. If the keys do not match then you will be prompted to re-enter the encryption key otherwise you will proceed to the next wizard page
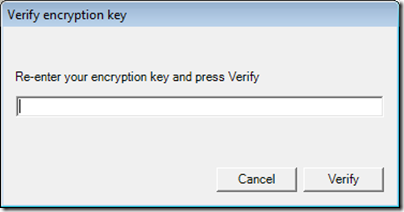
Figure 12 – Archive Manager encryption key validation
A list of devices that can be used to store your archived data is displayed. This list will include the OBH server device already configured as well as any local devices compatible with Archive Manager. A list of auto-detected storage devices will also be displayed. You can use any of these devices with Archive Manager to protect your archived data
Note if you have additional local storage devices not displayed in the list then power-on the device and press the Scan button to automatically detect the device. If you want to configure a local server UNC path (e.g. \\myserver\myshare) as a storage device then press the Add button and specify the UNC Path, Username, and Password
Press the Next key to continue
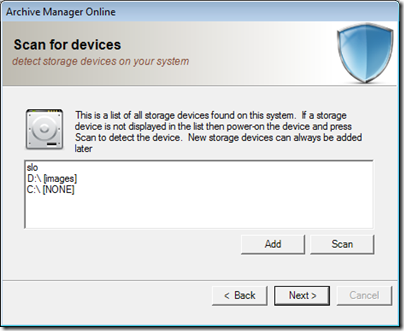
Figure 13 – Archive Manager device list
Archive Manager’s one-time configuration wizard is now completed. Check the box “Launch the job creation wizard now” and press the Finish button to create an archive job
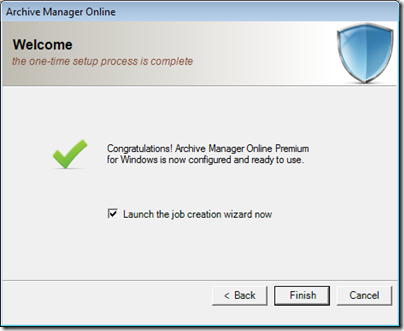
Figure 14 – Archive Manager one-time configuration complete
Now it’s time to create an archive job. The archive job will be used to create one or more archives; each archive will contain your protected data
Select the Create New Job radio-button and press the Next button
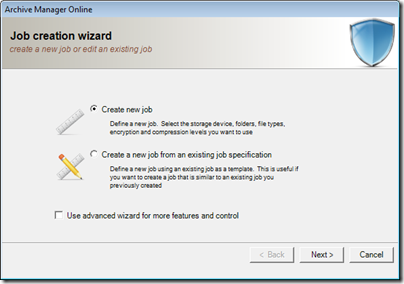
Figure 15 – Archive Manager job creation wizard
A list of all storage devices is displayed. Select the OBH server device and press the Next button
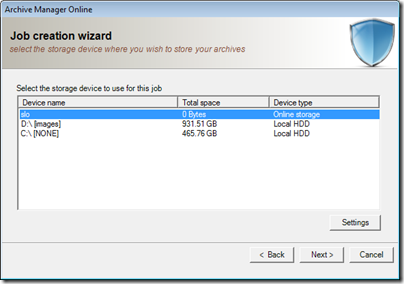
Figure 16 – Archive Manager device selection
Optional: Archive Manager allows archiving data to a proxy device. This is a useful feature when large quantities of data will be archived to a relatively slow storage device. For example, when creating a new archive job which will initially process many hundreds of gigabytes or more it might be reasonable to use a proxy device based on the speed of the internet connection between your system and the OBH server. The first archive would be created on a local storage device such as a USB key or removable USB hard-drive. Once the archive is complete then that local storage device can be sent to the administrator of the OBH server to be imported. Future archives, which would be smaller in size since only new and changed files would be processed, would be archived directly to the OBH server without the use of a proxy device. If you want to enable a proxy device then visit http://www.thearchivemanager.com for advanced details on configuring a proxy device, sending the proxy device to the OBH administrator, and resetting a proxy device for an existing archive job.
Select None from the device list and press Next to continue
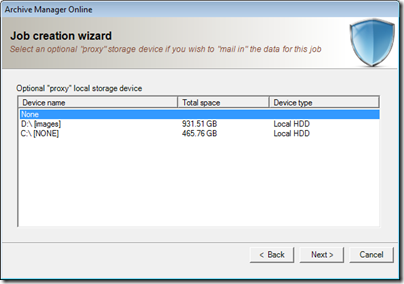
Figure 17 – Archive Manager ‘proxy’ device selection
Select one or more folders to be archived whenever this archive job is activated
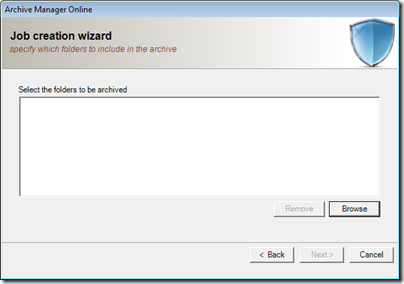
Figure 18 – Archive Manager select folders to protect
Press the Browse button to browse for folders. If you need to select more than one folder then press the Browse button again for each folder to be added
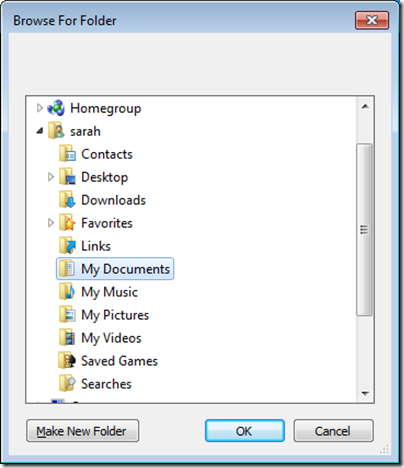
Figure 19 – Archive Manager folder selection
After selecting the folders to be archived then press the Next button to continue
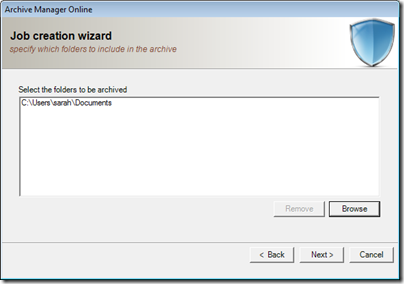
Figure 20 – Archive Manager folder selection view
Select the following options:
· Encrypt – to secure files with AES 256bit encryption
· Compress – to make files smaller before transmitting
· Verify after – to verify files have been archived successfully
· Only Archive new and changed files – archive the smallest sets possible
· Status reporting: Basic – only log warning and errors
· Queue processing: Normal
Press the Next button to continue
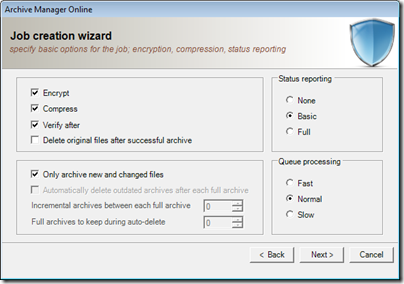
Figure 21 – Archive Manager general settings
Select the following options:
· Set a schedule
· Daily
· Daily start time 10:00 PM
· File count change equal to or greater than 20
This will create an archive job which will protect all files each evening at 10PM or whenever 20 or more new or changed files have been added to your system. This is a good all-purpose archive job since it provides a minimum daily archive as well as versioning of your files if they are altered during the day. If you want dedicated versioning of each file change then you could change the “File count change equal to or greater than” value to 1. A setting of 1 would archive every version of your files in real-time as they are changed or created.
Press the Next button to continue
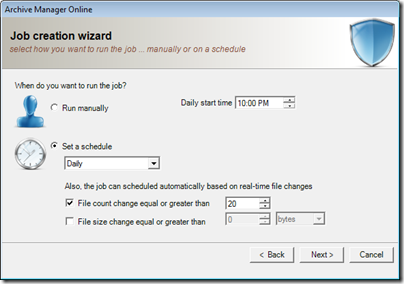
Figure 22 – Archive Manager schedule settings
Enter a description of the archive job to remind you what it contains then press the Finish button to continue
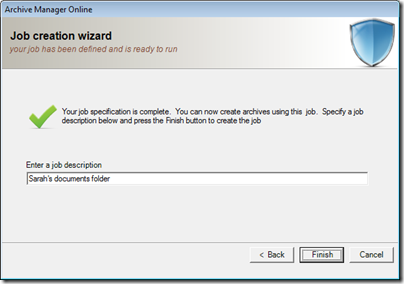
Figure 23 – Archive Manager job description
The archive job has been created and is now ready to protect your data. You will see the main Archive manager screen. The Upcoming Events list shows the archive job is scheduled for 10PM tonight.
Archive Manager will automatically run the archive job at 10PM every night, waking your PC if it is in sleep mode if necessary. Also, after the initial archive is created, Archive Manager will automatically create new archives when 20 or more files are changed or created any time of the day.
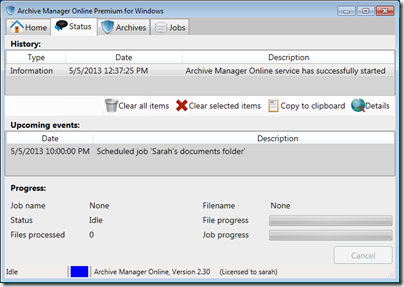
Figure 24 – Archive Manager status view
If you want to create the initial archive immediately then:
· Select the Jobs tab from the tab bar located on the top of the main screen
· Select the archive job from the list
· Press the Run button in the lower-right corner of the main screen
The Status tab will automatically be selected an you will see progress of the archive being created
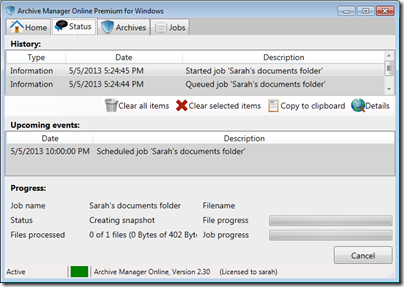
Figure 25 – Archive Manager progress during operation
One known downfall of online backup is handling of large data-sets. Even when high bandwidth connections are used, the transfer speeds remain slow compared to most other backup devices. Archive Manager and OBH client offer the ability to “mail-in” these large backup sets to reduce bandwidth burden. Instead of backing up directly to the server over the internet, the backup is pushed to a temporary removable media (e.g. usb key, HDD, etc) and then sent to the administrator of the OBH server to be imported directly on the server.
Archive Manager makes this “mail-in” process simple. During job creation, the third page of the job creation wizard will prompt for an optional “proxy device.” All removable storage devices can be used as a proxy device. Select the device you wish to back up to and complete the wizard as normal – just make sure the storage device contains enough free-space for the backup data. Run the new job then disconnect the removable storage device from your system and send it to the administrator of the OBH server. The administrator will import your data from the storage device; after-which the data will be available to you for download.
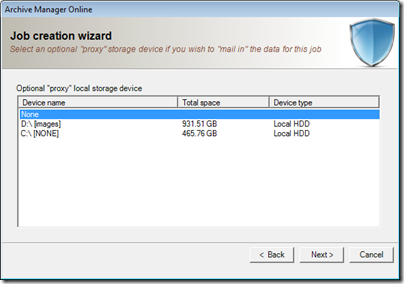
Figure 26 – using a proxy device to "mail in" large backup sets
Wrap up
This covers installation and configuration of the Archive Manager software. Archive Manager is a powerful backup and archive client allowing you to protect data to your OBH server directly over the internet as well as any local storage device. The next article will re-visit the OBH client and get into more details for advanced configuration, security, and user management.
