Turning your HP MSS EX49x into a Virtual Server – Part 1
Introduction
This article is based around upgrading the hardware in an HP MediaSmart Server EX490. Later articles will cover installing VMWare Virtual Server 2.0 and guest operating systems.
Say What?
There are a lot of articles and posts on the internet showing you how to run Windows Home Server in a virtual environment. I did consider turning my EX490 into a Virtual Server using VMWare ESXi (the enterprise Virtualization solution) but because I would severely lose out on important storage characteristics with regard to the ability of hot swapping and expanding the virtual disk datastore I decided against it. Long before ESX (and ESXi) though was Virtual Server from VMWare supporting a more traditional approach of an application layer on top of the operating system – as opposed to installing a Hypervisor on top of bare metal (the machine itself with no underlying operating system). Anyway this is not a lesson of which is best or why use virtualization, I assume if you are reading this then you are familiar with Wikipedia for definitions and are interested in taking advantage of your ‘always on’ home server.
Let’s get onto the same page here. I’m a growing software developer and a keen home computer enthusiast coupled with the fact that my job encompasses technology running on diverse platforms including the utilization of virtualization and cloud computing. I want to have a slice of that at home too which will help with my software development in terms of proving my applications on a number of platforms (read as different Windows Versions) but also allow me to run a Linux server. I’m Red Hat certified so don’t be surprised at my choice of Linux Distribution when we get to that part in the later articles.
Virtualization brings with it a number of advantages, the one for me that we will be dealing with today is that of consolidation. That is migrating existing servers/computers to a virtual environment reducing cost overheads, physical presence and maintenance effort. It definitively doesn’t have the same impact in the home as it may do in your workplace but there is one more issue that is worthwhile when considering the OEM and Home Built Windows Home Servers. Microsoft decided against providing a mechanism to backup Windows Home Server (I’m ignoring Vail for now as it’s not a released product line). The idea is that the operating system itself is expendable – in other words the loss of a system drive given that other important user data had been protected with duplication could be simply resolved by performing a server recovery. Ignoring the ‘recovery’ issue of installing many updates, potential lost backups (see WHS BDBB for the solution) and recreating users accounts there is the chance that you have installed ’extras’ outside of the Windows Home Server environment. That is media servers, applications and utilities that don’t work with Windows Home Server directly but are Windows XP/2003 compatible and there is the fact that you would like to get back to that setup after a system drive loss. What if all those extras were wrapped up inside a Virtual Machine or more and given the protection of a Windows Home Server backup – now you see that the earlier plug of WHS BDBB is actually quite meaningful. My guide will have you installing the virtual datastore on the system drive of your server and if that drive is lost or damaged then it would mean the loss of your Virtual Hosts utilizing the Virtual Drives in that datastore.
The Hardware
The EX490 uses standard commercial off the shelf components when it comes to the processor and memory. This makes its really easy to find the components that suit you and your pocket but most importantly will work with the MediaSmart Server.
CPU
The processor shipped with the unit is a fairly modest Intel Celeron 450 and memory requirements are furnished with one 2GB PC6400 (800MHz) DDR 240Pin DIMM. This is fine for most purposes but the more powerful EX490 ships with an Intel Pentium E5200 and there are hundreds of posts out there with people who have upgraded their EX490s with the E5200 or the slightly pokier E5300. If you looked at the specs given in the previous links for these CPUs then you will notice that they have 3 very important things in common. First is that they are in the same packaging, LGA775, this means they will fit the socket on the server motherboard. Second is that they are designed with the same thermal characteristics of 65W Power with respect to heat dissipation (TDP). You’ll see some articles out there with people upgrading the EX series with much higher rated CPUs that go over this limit and unless you intend to do something more with cooling then it’s best to avoid these CPUs. 65W is the maximum the EX49x can cope with given it’s heat sink and internal fan configuration. The third point is moot in this case but worth bearing in mind when upgrading CPUs is that the voltage range is within that supported by the motherboard. Those links to http://ark.intel.com/ should serve as your guide to what is what when picking a CPU for virtualization. It needs to be rated at or below 65W TDP in the LGA775 packaging and for best performance with virtualization it needs to support VT-x, Intel® Virtualization Technology. I’m not going to tell you which CPU to use as prices change all the time and popular online auction sites reveal various bargains each day. I chose the Q8400S, the most important thing is that when going for the higher spec CPUs that you look for the S version. The S means it’s the lower power sibling of a much hotter CPU. Before bidding/buying check the CPU spec on ark and make sure you get the stepping from the seller to ensure they really are selling the S version. Ensure you get a unit that has a max TDP of 65W or less, that is supports virtualization and that it is in the LGA775 form factor. The target CPU will more than likely be created with 45nm lithography so this is a good clue you are looking in he right direction. If there are a few CPUs at similar prices choose the one with more cores and 2nd level cache rather than outright processor clock speed. Your server will still have to carry out it’s Windows Home Server duties whilst taking on the new load of a virtual host or two so a dual or quad core CPU is going to handle it easier than simply a faster single core processor. You’ll still ultimately be limited by hard disk throughput so big GHz is not necessarily required here.
Memory
Likewise with memory you’ll be sharing that between your Server OS and your Guest OS(es). More is better and when it comes to selecting memory the choices are limited. The HP EX4xx series only has one slot for memory. This will take a 240-Pin Dual Data Rate (DDR) Unbuffered non-ECC DIMM at speeds up to 800MHz (PC2-6400). I could only find one supplier in the UK that would allow me to upgrade the memory in my EX490 to 4GB. Crucial UK sell the CT51264AA667 and although it’s rated at 533MHz (PC2-5300) my chosen processor allowed for a 1:1 FSB to memory ratio when installed, which I believe negates the reduction in overall clock speed once you factor in the lower latency. Typically most MediaSmart setups won’t be using all of the standard 2GB of memory so if you only intend to run a single very lightweight Guest OS when it comes to memory requirements then you shouldn’t feel as though you should upgrade. However, for me I did the math and found that in getting rid of the server I was going to migrate would pay for itself in less than one year, taking into account the electricity costs of having another PC powered on the whole time.
Hard Disk
You virtual host will need to use some of the space on your Windows Home Server. It’s very important that this disk allocation does not fall under the control of Drive Extender as VMWare won’t be able to cope with any virtual disks or logs files moving around whilst they are in use. You will have to create the Virtual Datastore within the System Area of the D: Drive, that is the root folder. Another point is you should know how much disk space your virtual machine is going to use and set the virtual disk size to be that amount plus a few GB for overhead. The prime role of your Windows Home Server is not virtualization and in most scenarios you don’t want to take too much out of the reserves used for user data storage.
When creating virtual disks there are two routes that can be chosen when it comes to provisioning the data allocated to the virtual disk. One is Thin Provisioning which creates a phantom drive without actually using all the disk space initially. This provides for fast allocation (because none really occurs) but at the cost of lower performance on first allocation in use and the possibility that the underlying storage mechanism (Windows Home Server in this case) is full before the virtual drive is full – which is bad news. I went with Thick Provisioning not only because this is the only option with VMWare Server 2.0 but it gives the best performance and safe guards against data loss from disk space under-allocation.
To The Bench
So you’ve made a backup of your Windows Home Server – this is quite a good time to do it – and powered down your unit ready to be dismantled. You’ll need some good quality screwdrivers (cross or Phillips) in small and medium sizes. I recommend you work in a clean area on top of a flat solid table. Also you will need an antistatic bag or two (you can use the ones that come with your new components).
Warning: A potential risk to electronic components which includes CPUs, Memory and Hard Disks is Electrostatic Discharge or Static Electricity. Touching electronic components if one has a build up of static electricity on ones body can lead to permanent damage to the component. Before working on a unit you should ensure you have grounded yourself and that you are not wearing clothing that generates static electricity (wool and nylon) or standing on carpet.
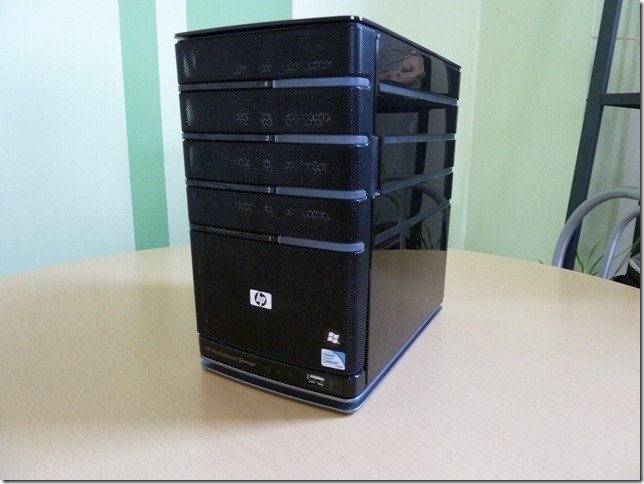
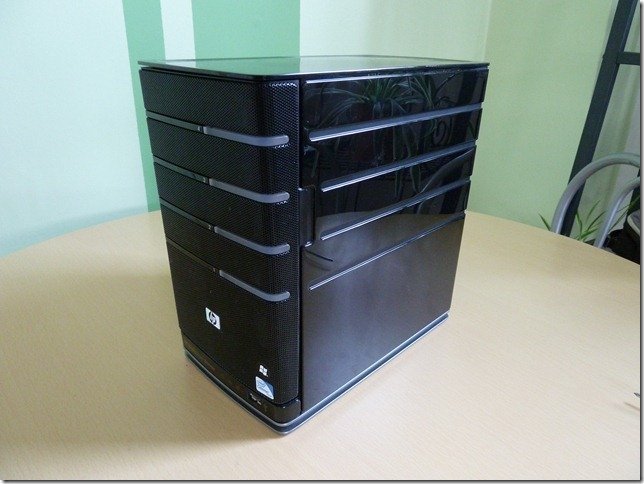
All grounded? Start with the EX49x facing you:
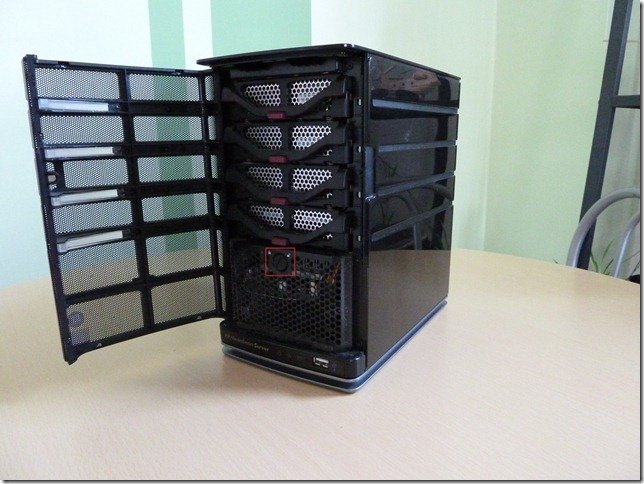
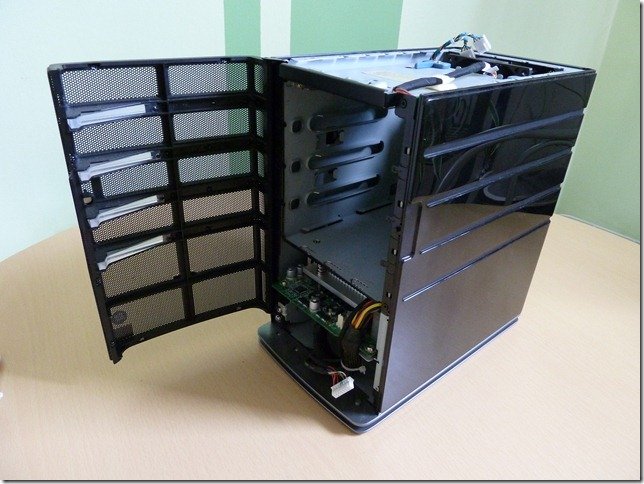
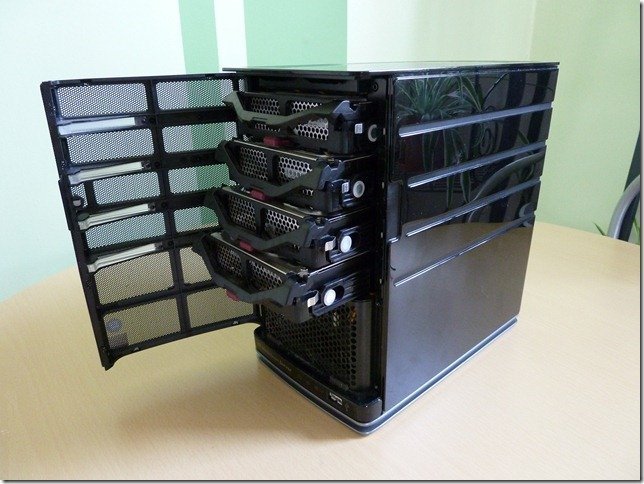
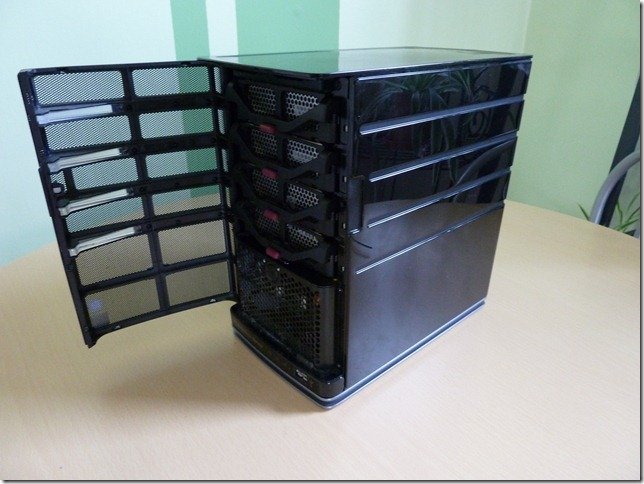
Open the main door to reveal the drives and below the lowest drive turn the locking mechanism for the system drive clockwise with suitable coin or large flat bladed screwdriver:
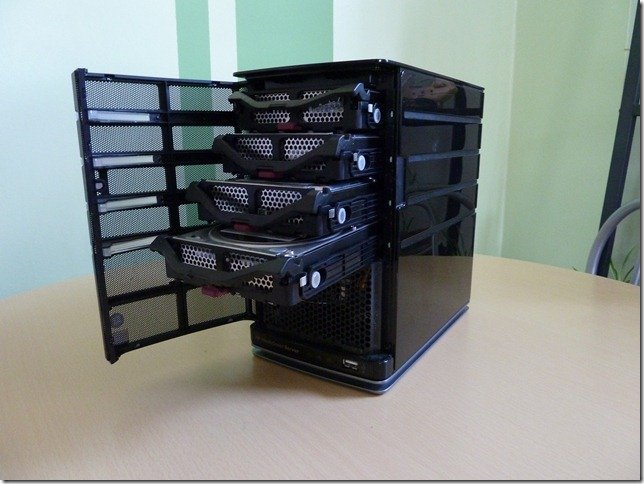
Release each drive catch in turn and remove the drives one by one, sticking a post-it note on each drive with the location of the drive. I numbered them 1 to 4 with 1 being the lowest position and 4 the top drive.
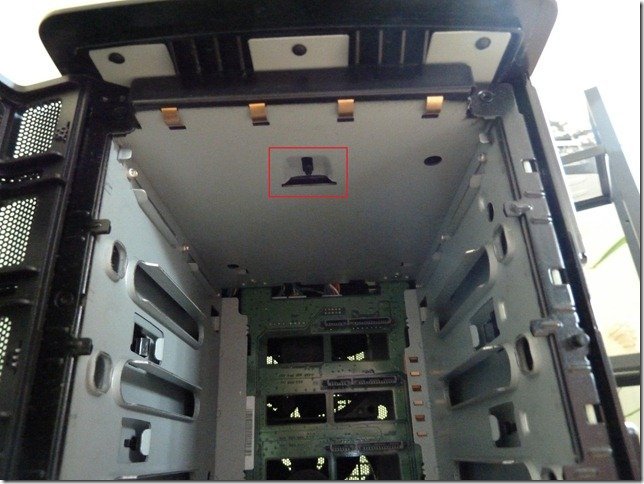
Next you need to release the top cover. First you need to locate the catch underneath the top cover. Look forward and up into where drive 4 was located and you will see a little black catch:
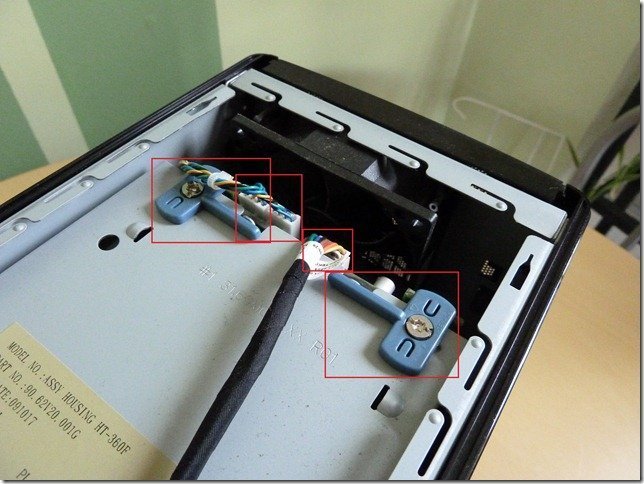
You need to apply gentle but firm pressure to the catch whilst sliding the top cover towards you and bending the front lip of the top cover up slightly. The plastic is quite strong but you must be gentle with it – the cover will slide forward about a centimeter allowing you to then lift it out of the way to reveal the SATA Backplane Board Catches:
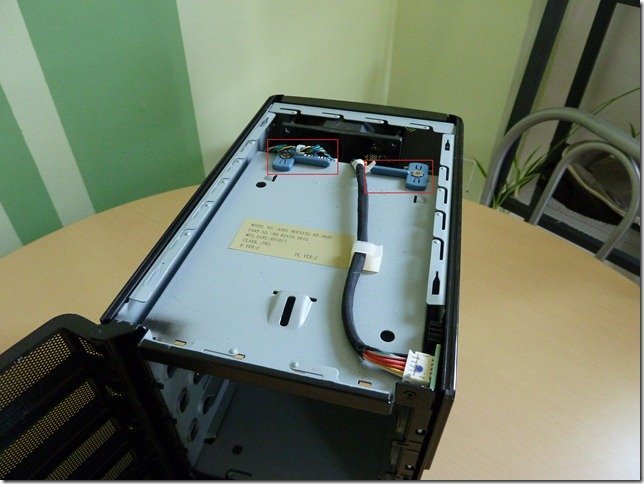
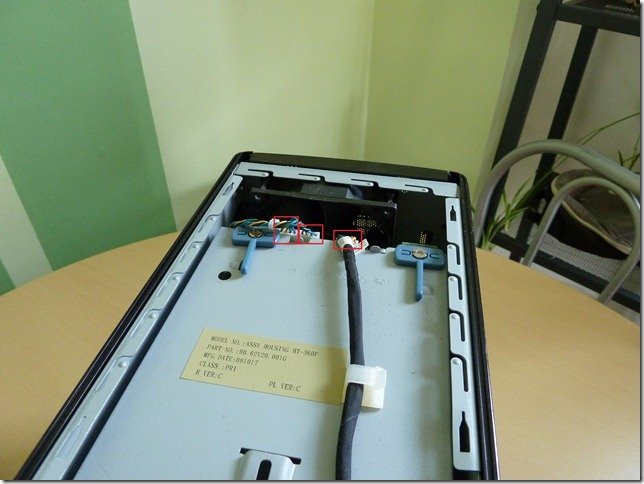
Rotate the left catch clockwise 90 degrees and the right catch 90 degrees anti-clockwise. Take a marker pen and label the two plugs on the left with A and B or L(Left) and M (Middle) or draw a line over where the plugs meet. This is to aide you in getting these connections correct when you put your server back together:
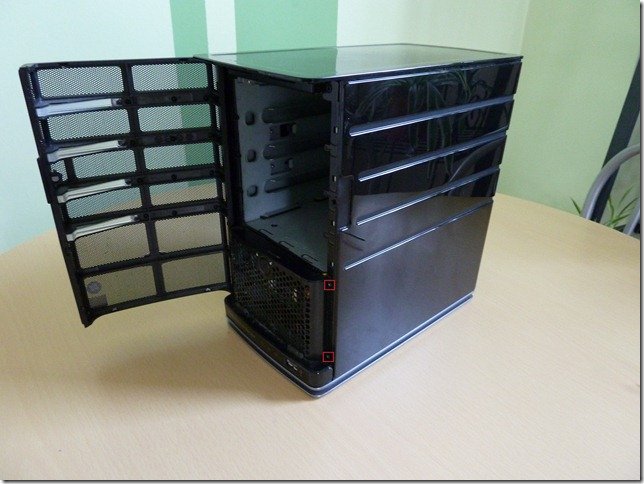
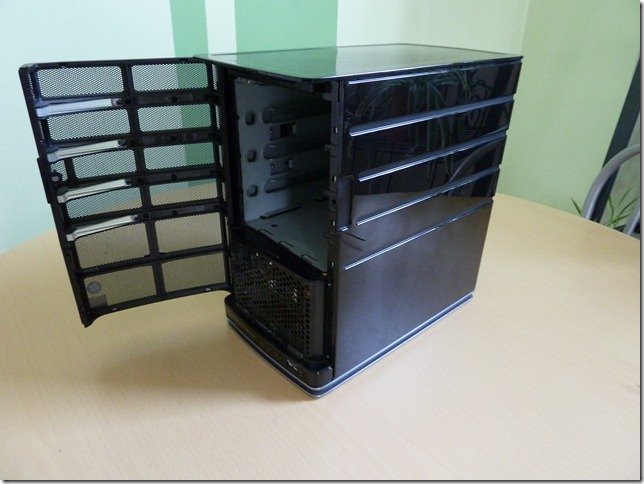
Disconnect the three plugs from the SATA Backplane Board. With one hand inside the drive enclosure (where drives 1-4 were) locate a hole in the board and whilst applying slight upward pressure pull the board upwards from the top. You should feel the board positively disconnect from the socket in the motherboard and it should be free to move backwards away from the front of the server a centimeter allowing you to pull the SATA Backplane board free of the server. With the smaller screwdriver remove the two screws (anti-clockwise) holding on the lower ventilation grill:
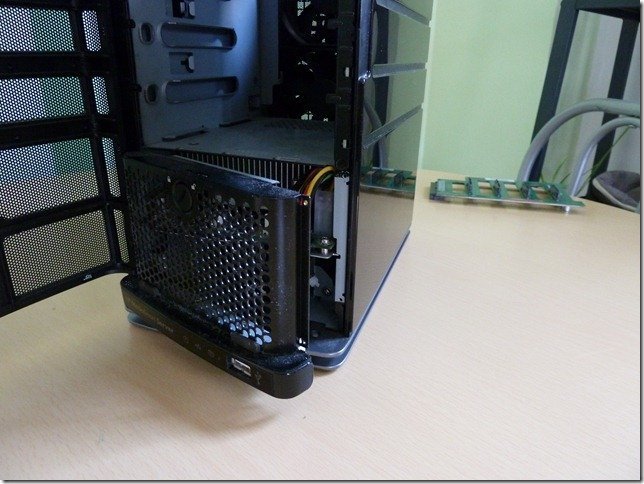
Hinge the grill out, disconnect the single lead and remove the grill free of the server noting the locating lugs on the left hand side:
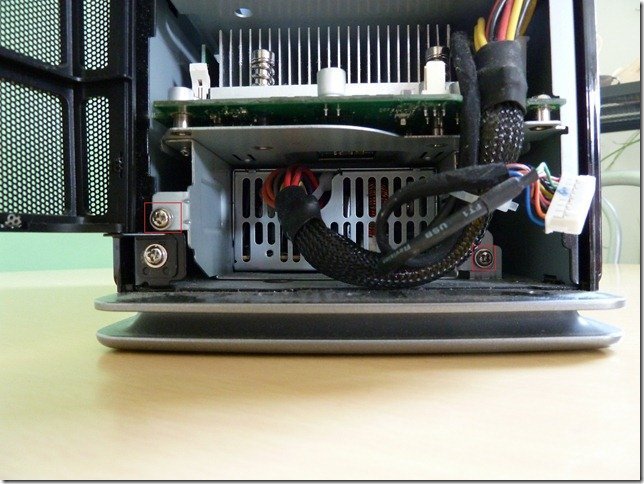
The grill has been removed to reveal the motherboard which is bolted to the power supply. The combined unit is secured to the enclosure by two (2) screws, remove each one ensuring that nothing is left connected at the rear of the server. Be careful not to remove the screw holding the door hinge:
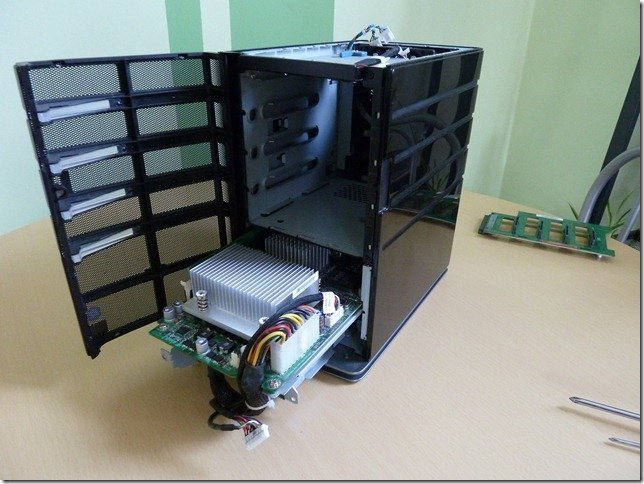
Gently slide the motherboard and power supply unit out of the enclosure towards you being careful to support it’s weight as it comes out:
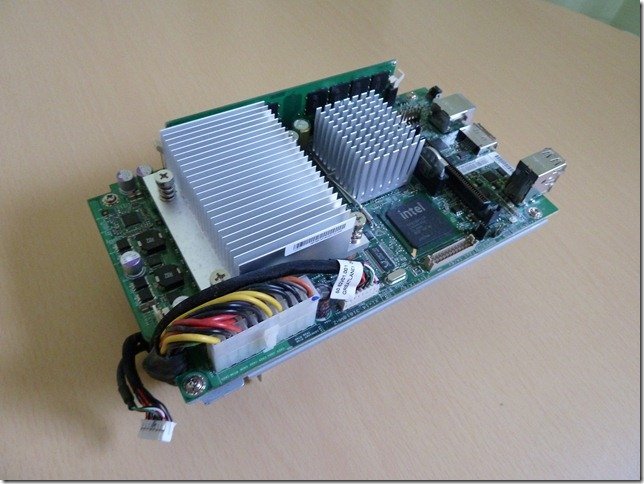
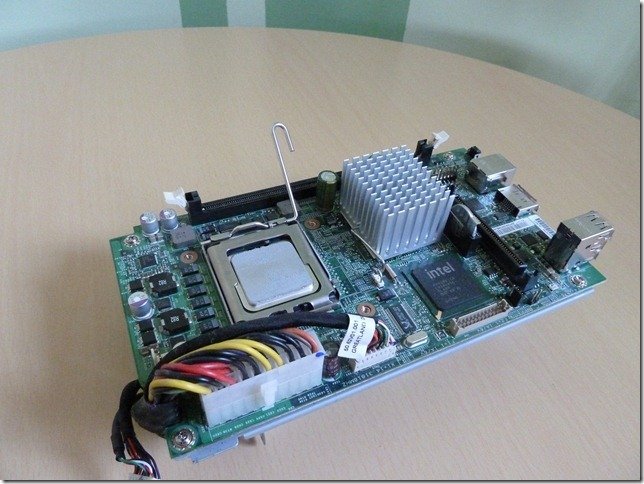
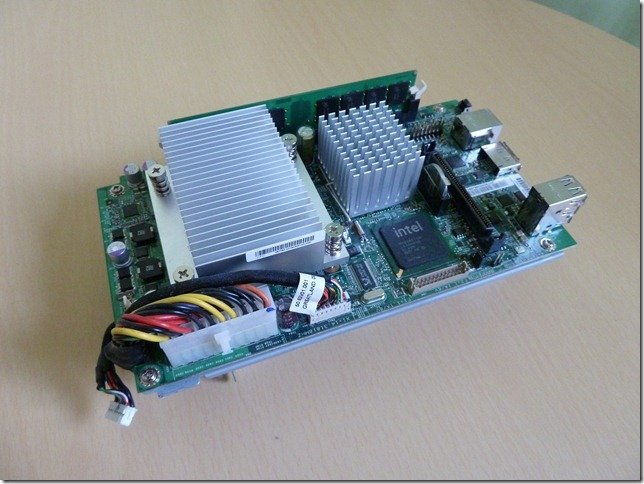
Clear the area of the drives and server parts to leave you working only on the combined power supply and motherboard unit. Note it’s not required to remove or tamper with the power supply unit under any circumstances:
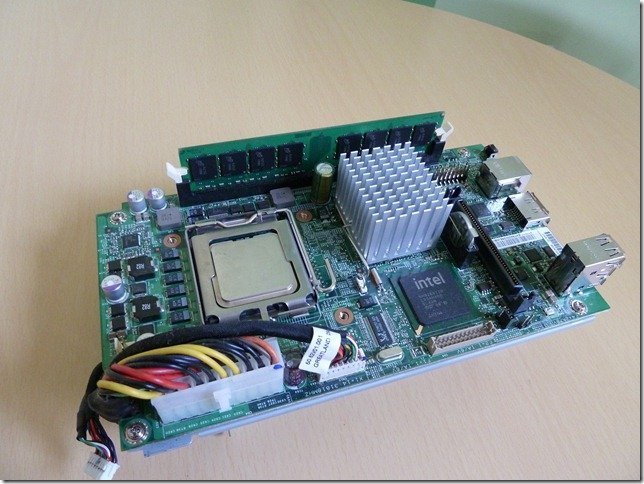
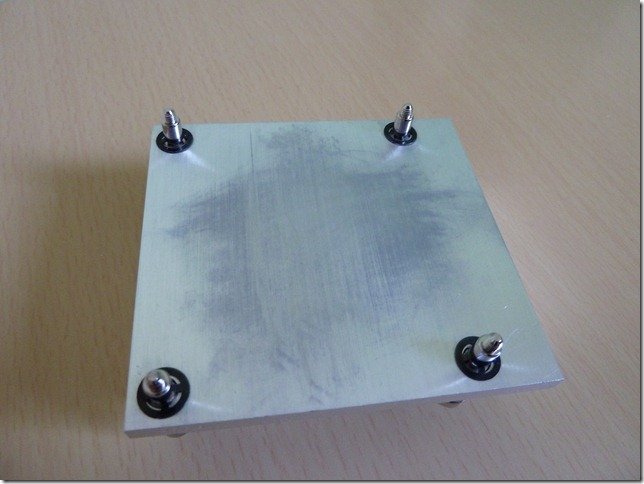
The large heatsink is secured by 4 fasteners to the CPU and the Memory module is the long board with chips located in the top side of the picture above. Using the larger screw driver carefully undo each fastener. Whilst undoing each one apply gentle pressure to the heatsink to prevent the possibility of it springing up off the CPU. When all the fasteners are undone remove the heatsink and place it fins down on the table – you don’t want heatsink residue stuck to the table. It may be required to rotate the heatsink very slightly or apply moderate force to break the bonding of the thermal paste between the CPU and heatsink. Certainly do not apply any levering techniques to remove the heatsink and visually inspect the underside of the heatsink corners to confirm that all the fasteners are fully undone and free. With the heatsink removed gently push down on the white tags either side of the Memory Module whilst pulling upwards to remove the memory module – store this in an anti-static bag if you have one or keep it somewhere safe on the table:
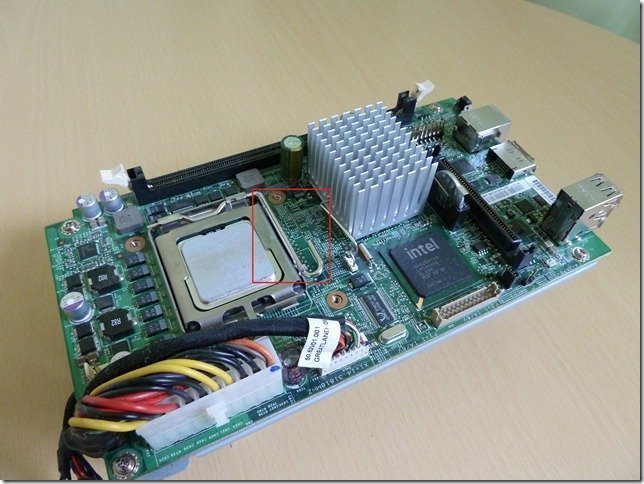
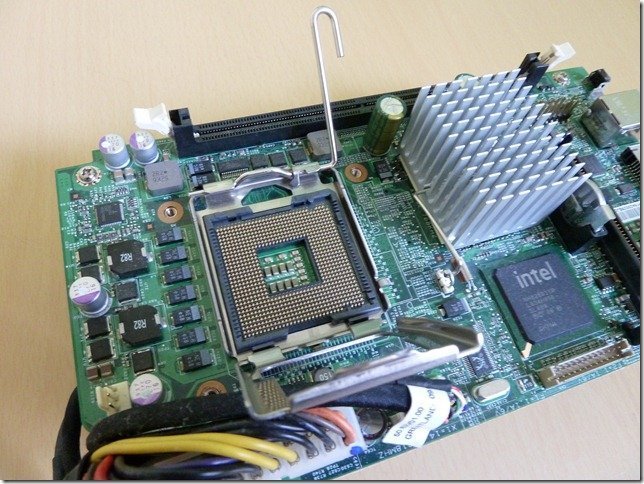
Gently push down on the lever above in the lower right hand corner and move it to the right to clear the catch and then lift it up fully so that the retaining mechanism releases its pressure on the CPU:
Lift the retainer, remove the CPU and place in an anti-static bag:
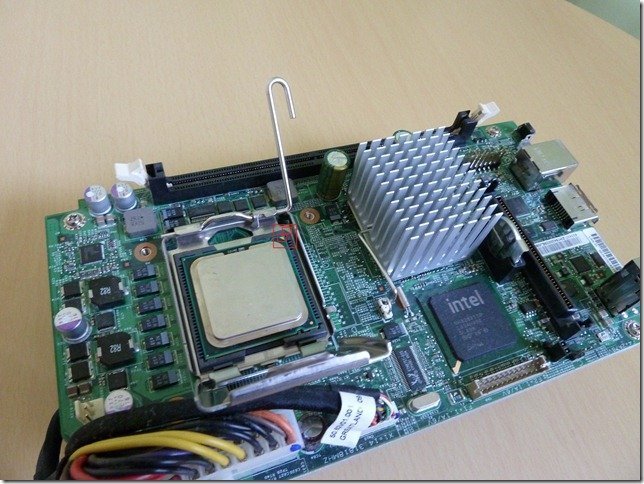
Place the new CPU into place observing the orientation marks on the CPU and socket:
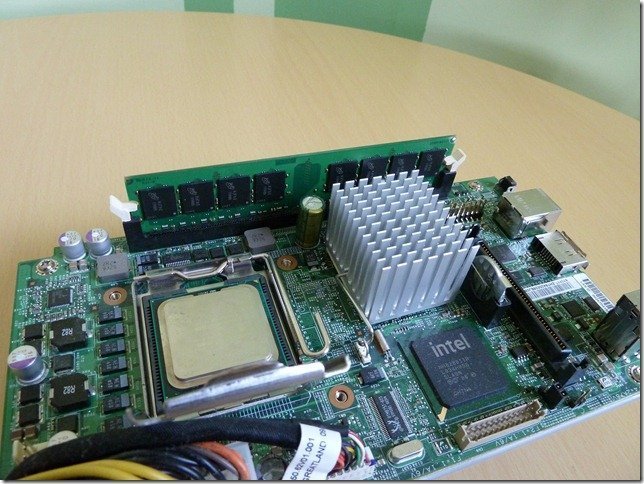
Move the retainer arm down out of the way of the memory module slot. Take the memory module out of its packaging and taking note of the indentation, in the side of the module with the contacts, locate it into the memory slot. Gently apply downwards pressure on the top edge of the memory module whilst pushing in on the white catches. The memory module should positively click into place. If this does not happen either the memory is located incorrectly or it is of the wrong type. Double check orientation and type:
Now raise the retaining arm and move the retainer down over the CPU ensuring that the CPU is laying flat in the socket. Move the arm down applying pressure on the retainer and slide the end of the arm into it’s catch:
Take the CPU and clean any remaining heatsink compound from it:
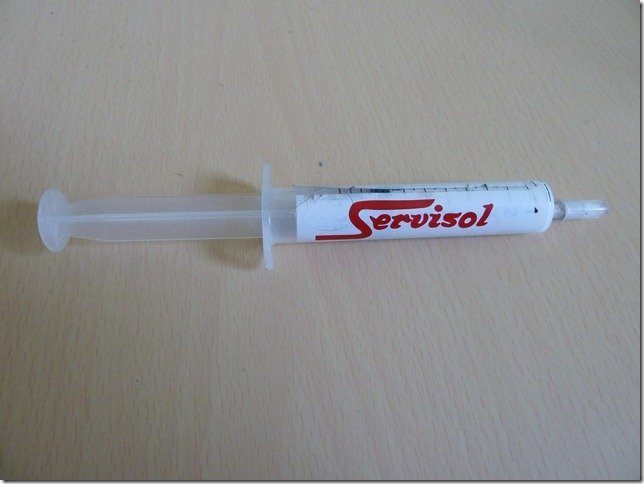
Using a high quality thermal compound, my preference is Servisol but arctic silver is a popular choice also, place a small, less than pea sized, amount of compound on the center of the CPU face:
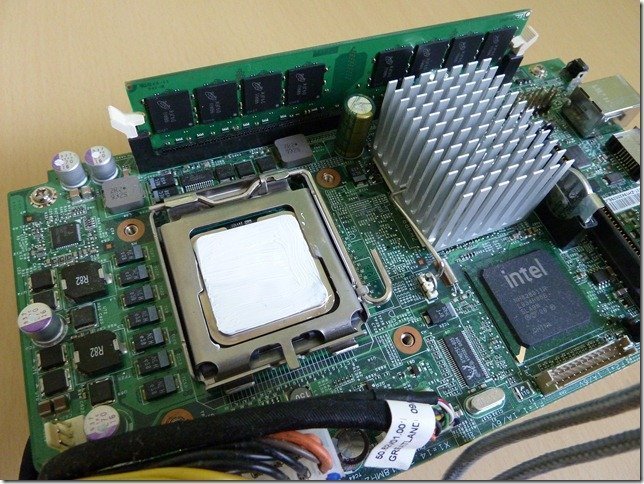
Spread the compound evenly and thinly over the surface of the CPU. When applying thermal compounds (heatsink pastes) less is more. At a microscopic level fissures and holes exists between the mating surfaces of the CPU and heatsink. These will act as an insulator preventing efficient use of the heatsink. The thermal compound is there to fill in these gaps but too much compound and it will act as an inhibitor to the efficiency of heat transfer. The photo below actually shows too much compound and I removed a significant amount after it was taken:
Take the heatsink and place it over the CPU noting the correct orientation of the fasteners to the fixing holes in the motherboard. Applying slight downward pressure wiggle the heatsink to help spread the compound more evenly. First secure each fastener into each fixing hold by a few turns and then whilst applying a little more downward pressure do up each fastener tightly.
Reassembly of the MediaSmart server is the opposite of disassembly. First slide the motherboard and power supply assembly back into the enclosure:
Using the two silver screws secure the power supply to the enclosure. Next take the SATA Drive Backplane and with one hand inside the enclosure and another hand on top to steady the backplane locate the board into the retaining slots. With the backplane lined up correctly firmly push it into the motherboard – it should positively click into place. Connect the three plugs into their correct locations in the back plane and rotate the blue catches back into place as below:
Next take the lower front ventilation grill and reconnect the plug to it. Locate the grill lugs into the recesses on the left hand side of the enclosure and fasten it in place with the small black screws. Be careful not to over tighten these screws as it is very easy to damage the heads:
Taking note of the drive original locations (this is where the post-its are useful) place each drive back into its bay – don’t leave the post-it notes on the drives.
Firmly locate each drive and close the retaining catch, finally locking the system drive into place:
That should be it. Closing the door on the unit should be the last thing to do before plugging your MediaSmart Server back in and checking the upgrade was a success:
Power Up
Connect your MediaSmart Server back into your network and with power. Turn the unit back on using the power switch on the rear of the unit and after a few second verify that the power, network and system light illuminate. The system light should be flashing and eventually go solid when the 1, 2, 3 or 4 drive lights illuminate also. If the system light is still flashing for more than a minute don’t panic – chances are your unit has decided to do an extended disk check on this boot up, leave it until it has finished though it could be hours.
Open the Windows Home Server Console and open the Settings Window. From there open the Resources tab and verify that your CPU has been detected and that you have 4.00 or 3.99 GB of RAM:
You do? Then great! Your new CPU brings new features and you may be required to reboot your server once or twice before they are all in use. Hang around for a few minutes and reboot your server when prompted.
Virtually There
Next we want to check the virtualization is enabled and working on our server. If you didn’t pick a CPU with virtualization support (i.e. VT-x) then you can skip this step. Go to grc.com and run Securable. You will need to do this from a remote desktop session and rather than open up your Home Server to the internet a little more I suggest downloading the executable to the Software Share on your Home Server from a client PC.
Simply run the executable and ensure it detects that Virtualization is enabled:
Don’t be worried that your S Processor is detected as it’s more power hungry stable mate. The chips are actually identical from the perspective of much software and the actual difference is in grading of the processors during final production. If you want to double check then you can run CPU-Z from CPUID on your Windows Home Server. Again download it to a Shared Drive from a client PC and virus scan it there to be sure it is safe. Differences in quoted Max CPU rate and actual core speed may be attributed to SpeedStep.
I recommend a period of burn in with any hardware change with an elevated level of processing or system stress. For this I used Prime-95 from mersenne.org running overnight with the central heating on max in the office with the doors and windows closed. However, I do not recommend burn in on production system or that containing your family photos or other important data if you can’t recover. That is one reason why it’s good to do a full backup before any hardware changes.
Next time we’ll be looking at installing VMWare Server 2.0 – in the meantime it might be a good idea to register with VMWare and download VMWare Server 2.0 for free and get your license key.
Share this WHS Article with Others:
